

Hey there! I was bored and created a few primal fights. I'd love to hear your feedback and feel free to submit your own!
Please only use monsters/summons from previous FF games.
Cerberus and Fenrir - Guards of Bahamut
The keys to unlocking Bahamuts power have been guarded by two very powerful beasts, Cerberus and Fenrir. These beasts have been tempered by an unknown primal and their sole duty is to prevent anyone from approaching Bahamut's soul separating device. What primal has so much power it can temper beasts far greater than any found in the wilderness? What are Cerberus and Fenrir? Perhaps confronting them in battle will answer the many questions before us.
Arena: The arena is a large circle with mini circles within the circle and different runes spread evenly across the sections created by the circle. You start the fight with Cerberus in the arena in battle position and Fenrir just outside sleeping. A changing moon can be seen above, growing fuller depending on which phase.
http://i228.photobucket.com/albums/e...irCerberus.png
Phase 1 - Cerberus
Roar - The three Cerberus heads roar in sync scaring the target, dropping their defense 25% and removing their ability to parry or block.Raises the targets HP 25% Duration 30 seconds.
Acheron Flame - Cerberus pulses an AoE Fire nova that is unavoidable. Does moderate fire damage and causes burn on all targets without Scholar shield or stoneskin.
Sulfurous Breath - Three consecutive cone attacks that rotate between the three heads.
At 75% Cerberus will roar in pain and retreat out of the arena. The party is given 10 seconds to recover while Fenrir wakes up, snarling and leaps into the arena. Cerberus can be seen outside licking his wounds.
Phase 1 - Fenrir
Lunar Cry - Fenrir releases a howl so majestic it leaves its target in awe. Decreases the max HP of the target by 25% but increases the targets defense by 25% and restores ability to parry and block. Duration 30 seconds.
Lunar Roar - Removes all buffs from the party, not including stances.
Eclipse Bite - Fenrir snaps his jaws at his target binding them in place for 15 seconds and doing critical damage.
At 75% Fenrir will leap out of the arena onto a cliff howling at the moon.
Phase 2 - Cerberus
Roar - Reduce defense 25%, remove parry block. Raises max HP 25%. 30 seconds.
Acheron Flame - Pulses an AoE. Burn on targets without Sch shield or stoneskin. Damage slightly increased.
Sulfurous Breath - 3 Consecutive cone attacks from each head.
Ululation - Two of Cerberus heads change their gaze to two other targets. Each target has three consecutive balls of lightning appear underneath them. These lightning quickly expand and when reaching max size (About the size of Titan's Plume) they activate causing damage and paralyze.
Fenrir - Crescent Fang - During this phase the runes around the outer circle will start lighting up. Each rune signifies a different class. After a rune has lit up that particular class has 5 seconds to stand on the rune or Fenrir will charge at that player doing an unavoidable line attack covering the length of the arena. These runes activate during each Ululation but will never be the same class as player they are targeting. If more than one of the same class is in the fight, Fenrir will charge each player that fails to reach the rune.
Upon reaching 40% Cerberus will run to the center of the arena and slam his three heads into the ground. He will use an attack called Gates of hades which has a 1 minute cast time. During this time all three heads will be separate targets. The team must DPS each head down. When one heads health reaches 0 it pulls its head from the ground and starts casting Uluation on a player. When a second head reaches 0 it will do the same. During this time Fenrir is also lighting up runes and using Crescent fang. After the one minute Cerberus cast Hellfire which does 20% damage to everyone and an additional 30% for each head in the ground when its cast.
After casting Gates of Hades Cerberus will be exhausted and leave the arena giving the party a few seconds to recover. Fenrir will now enter the arena entering phase 2 mode.
Phase 2 - Fenrir
Lunar Cry - Fenrir releases a howl so majestic it leaves its target in awe. Decreases the max HP of the target by 25% but increases the targets defense by 25% and restores ability to parry and block. Duration 30 seconds.
Lunar Roar - Removes all buffs from the party, not including stances.
Eclipse Bite - Fenrir snaps his jaws at his target binding them in place for 15 seconds and doing critical damage.
Ecliptic Growl - Deals damage to everyone in the party, damage is reduced based on how many buffs each player has on.
Cerberus Lava Plume - During this phase the runes on the middle circle will start lighting up. Each rune signifies a different range of HP from tiers of thousands. One rune for 0-1000, one for 1000-2000, 2000-3000, 4000-5000, 6000-7000, 8000-9000, 9000+. Every player must move to the correct rune where their max HP belongs. Players who do not reach the rune in time will have a ground AoE attack instantly hit them and cause burn. This ground attack persists for 2 minutes and causes burn and damages anyone who enters.
Upon reaching 40% Fenrir will rush to the center of the arena and begin Howling at the moon. He will howl at the moon for an entire minute. While he is howling he will start filling a bar above his head. Curing and Buffing fenrir will reduce the bar. Stunning him will stop it momentarily. During this time Cerberus will cast Lava plume and Fenrir's howl will change colors. If the howl is blue he will cast Lunar Roar on everyone, moments later it will change to red and it will cast Ecliptic Growl on everyone. After the minute has finished Fenrir will cast Howling Moon and it will deal damage to everyone proportional to how high the Full Moon bar has filled. The bar can fill to up to 110% to prevent people from curing at the last second and surviving it. Damage fenrir takes during this phase will fill the bar faster.
After casting Howling Moon Fenrir will leave the arena and collaborate with Cerberus giving you time to recover. Then they will slowly walk towards the arena together, furious.
Phase 3 Fenrir + Cerberus.
Fenrir and Cerberus will possess all the attacks they did in the previous phases minus the runes. It will be required for tanks to switch tanking depending on which debuff they have. Their damage will be increased on all attacks. Each beast will have one new attack.
Fenrir - Lunar Marking - Marks one player at random with a phase of the moon. That player has 10 seconds to step on a rune in the inner circle indicating that phase, if the player steps on the wrong rune first or fails to step on the rune, both Fenrir and Cerberus lose all threat on their current targets.
Cerberus - Magma Hoplon - Grants either Fenrir and Cerberus stoneskin and a fire damage shield, removable with One Ilm Punch. 30 second duration.
---------------------------------------------------------------------------------
Diabolos
The awakening of Bahamut has stirred much more dangerous forces than the primals of the beastman. A evil force unknown has taken hold of the Shroud. The creatures of the forest act unusual and scared. Some turn on each other. Some refuse to leave their homes. Others collapse into a deep slumber.
The spriggans have dug too deep and breached the lair of Diabolos who slumbered heavily. The evil force of bahamut has awoken Diabolos who now seeks to fill as many hearts with fear as he can find.
After completing a mini-quest series that involves sleeping and having Diabolos enter your nightmares in cutscenes you will be led to the Spriggan cave in South Shroud where you will find Diabolos Aetheryte and unlock it for Duty Finder.
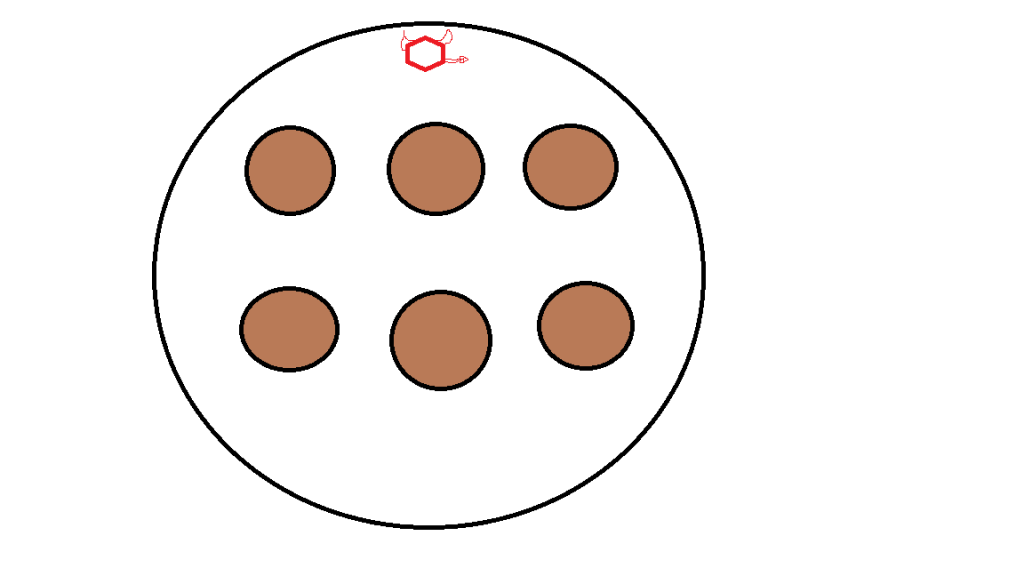
The arena would be the interior of a cave with six pillars evenly placed around the arena. The walls and the ceiling of the cave will be covered in a purple hazy mist created from Diabolos.
Phase 1:
Toxin - Diabolos instantly casts Bio, Bio 2, Miasma and Poison on two random players.
Demi - Takes either 10%, 25%, 33% or 50% of the targets max health away.
After reaching 80% Diabolos casts a map wide ability called Dream World. The entire map shifts to a darker purple fazed version of itself and your line of sight shifts so you can only see a little area around your character. Diabolos walks a pre-determined path around the arena trying to catch players. You must keep a pillar between him and yourself. If you are seen he instantly drops you and everyone around you to 1% of your health, mana, and tp. After finishing his path the area reverts back to before and he enters phase 2:
Phase 2:
Toxin - Diabolos instanstly casts Bio, Bio 2, Miasma and Poison on three random players.
Demi - Takes either 10%, 25%, 33% or 50% of the targets max health away.
Nightmare - Places black puddles on the ground randomly at three players feet, like Titan's Plumes. These activate at the same time plumes explode and remain on the ground for 15 seconds. Players inside after activation or that step inside fall asleep for 30 seconds and receive a powerful DoT that cannot be removed.
After reaching 65% Diabolos re-enters Dream world changing the path he walks and moving slightly faster. After the path is completed he enters phase 3.
Phase 3:
Toxin - Diabolos instantly casts Bio, Bio 2, Miasma and Poison on four random players.
Demi - Takes either 10%, 25%, 33% or 50% of the targets max health away.
Nightmare - Places black puddles on the ground randomly at four players feet.
Gravity - Places black pillars rising to the ceiling on the ground. Activate at the same time titan's plumes would after appearing. Players caught inside take damage and receive a 30 second gravity effect.
After reaching 50% Diabolos uses his signature attack Ruinous Omen. Unavoidable AoE that removes a random percentage of every players Health, MP and TP, capped at 95%. Immediately after using Omen he enters the dream world state and walks a new pre-set pattern. If he catches you in this dream world state you die instantly. After the dream world Phase 4 is entered.
Phase 4
Toxin - Diabolos instantly casts Bio, Bio 2, Miasma, and Poison on four random players.
Demi - Takes either 10%, 25%, 33% or 50% of the targets max health away.
Nightmare - Places black puddles on the ground at four players feet that persist for 15 seconds.
Gravity - Places black pillars rising to the ceiling on the ground. Players inside take damage and receive gravity.
Noctoshield - Diabolos covers himself in a black pulsating veil. DPS that damage him receive 50% of the damage they dealt back to themselves and heal Diabolos for 300% of the damage they do, does not apply to DoTs. Lasts 15 seconds.
Ultimate terror - At 25% Diabolos casts a black ball at one of the corners of the arena. The black ball melts into the ground and slowly starts consuming the arena. Players that step inside that black ball take 10% of their max health every second (or 30% every 3 seconds since the game updates every 3 seconds) the ball eventually consumes the entire arena after 3 minutes if Diabolos doesn't die. The smaller the arena gets the more difficult the other mechanics become to dodge.
Arena:
-------------------
Gilgamesh
After achieving all the primal weapons from beastman's primals a master smith tells you of a legend that involves combining the weapons to create an ultimate killing machine. You must have a primal weapon from each primal of the class you wish to participate in the fight for. High in the mountains in Coerthas Central Highlands lies a master of weapons, Gilgamesh. He is neither primal nor human, something inbetween. He sees that you have collected the weapons and offers you a deal. If you can beat him in combat he will give you the ultimate weapon, if you lose he will take the primal weapons for himself. (Not really just for story).
Phase 1:
Gilgamesh has six arms. During phase one he keeps four of them behind his pack at one time. He will randomly bring two arms forward. Each arm carries a different weapon. Lance, Axe, Sword, Fist, Staff, Scepter. Each arm has a 'mind of its own' and use abilities separate of Gilgamesh himself but cannot be targeted. Having two tanks in front of him will divide the damage from the left and right side between the two tanks.
Lance: Left Hand
Penta Thrust - Attacks target 5 Times for heavy damage
Impulse Drive - Single target heavy damage, reduces armor by 50%
Thunder Thrust - Line attack covering whole arena. Does damage and causes paralyze.
Axe: Right Hand
Steel Cyclone - AoE damage causing bleed to every target hit.
Sturmwind - Creates a tornado on the arena that persists for 30 seconds dealing damage and causing bleed.
Raging Rush - Throws the target to the other side of the arena setting their threat to 0.
Fist: Left Hand
Asuran Fists - Hits a random party member 8 times dealing critical damage.
Tornado Kick - Hits a random party member and spawns a tornado at their feet damaging increasing damage and growing bigger for 10 seconds.
One Inch Punch - Deals damage to a random party member removing all beneficial effects from them.
Sword : Right Hand
Shining Blade - Deals large light based damage to target
Red Lotus Blade - Deals fire damage to target and damage over time
Savage Blade - Deals Earth based damage to the target stunning them.
Staff: Right Hand
Firaga - Casts a red circle under a random party member dealing AoE fire damage.
Blizaga - Casts a red circle under a random party member dealing AoE ice damage and causing gravity.
Thundaga - Casts a red circle under a random party member dealing AoE lightning damage and causes paralyze.
Scepter: Left Hand
Cure III - Cures himself 15% of his life, stunnable.
Brainshaker - Drains random target of 50% of their max MP
Silence - Casts silence on a random party member.
Upon reaching 60% Gilgamesh will get angry and jump out of the arena and give you some dialogue, giving you moments to cure, then jump back in the center, doing a moderate unavoidable AoE to everyone and now use 4 arms at once keeping 2 behind him.
Upon reaching 30% Gilgamesh will get angry and jump out of the arena giving you some comical angry dialogue and then leap back in doing moderate unavoidable AoE damage to everyone and will now use all 6 arms at once.
Each arm will use abilities every x seconds on separate timers so something is happened almost all the time. Every xx minutes Gilgamesh will run to the center of the arena and pick a random weapon and use a special ability for that weapon until he is dead.
Sword - Spirits Within: Drops everyone in the party to 50% life.
Fist - Final Heaven: Instantly KO's a random party member preventing them from being resurrected.
Lance - Raiden Thrust: Will shoot a channeled line attack of lightning covering the length of the arena and slowly spin in a 360 degree circle. Causes paralyze and heavy damage every second.
Axe - Ragnarok: Causes a red firey AoE to form under every player that activates after 3 seconds and instantly kills anyone inside or who enter. Remain on the ground the entire fight.
Staff - Meteor: Does massive AoE damage to everyone in the arena, only survivable with stoneskin/sacred soil.
Scepter - Holy: Creates 3 massive red circles on the ground leaving 2 safe spots that deal AoE damage and stun for 10 seconds.
Upon defeating Gilgamesh he will agree to give you the ultimate weapon forged from all the primals.
Side Bonus: Having a tank equipped with Zantetsuken will trigger a cutscene with Odin appearing and some funny Dialogue from Gilgamesh on how he is better than Odin and Odin will retaliate by removing one of Gilgamesh's arms.
------------------
Anima
Spoilers: Gaius van Baelsar believes he can trap and torture the primals without consequence. The pain the primals have sustained has awoken a beast far darker and malevolent than even Garuda herself. The primal essence has leaked into a cave in western thanalan causing the plants to rot and water to turn to poison. A Aetheryte has been activated and from that Aetheryte, Anima has awoken.
The arena:
A floating flat platform floating in darkness.
Every 10,000 damage received Anima receives a stack.
Phase 1:
Pain - Does damage proportional to the amount of stacks on Anima.
Agony - Places a Unavoidable dot on every party member that ticks once for every stack on Anima. Clears Anima's stacks.
Cleaves - Frontal cone attack.
At 70% Anima turns the ground into blood and everyone gets sucked to the other side of the arena. On the other side Anima's appearance changes to a much more aggressive looking monster bound with chains. The entire arena has a red aura to it and the ground is covered in blood or a red goo. Phase 2 now begins.
Phase 2:
Chains - Chains erupt from the ground binding 2 random players. These players take light damage over time and cannot act. These chains must be destroyed to remove the effect.
Share my Pain - Anima creates shadow doubles of two random players. These players take the same damage as their shadows. The shadows have access to all skills their partner has and attacks random players/heals anima. Killing the shadow without healing the player will kill the player as well.
Omen - Anime hits his target for critical damage.
After reaching 40% Anima removes his shackles and releases a black aura on the ground. Half the party including 1 tank, 1 healer and 2 DPS are transported to the other side and Half the party remains where they are. Phase 3 now begins.
Side 1 Phase 3:
Damaging anima now applies stacks to Side 2 that cannot be seen by Side 1.
Chains - Binds 1 random player on each side, causes damage over time and prevents the player from acting.
Share my Pain - Creates a shadow double, one on each side.
Onslaught - Attacks the target multiple times causing critical damage.
Fear my pain - Places area effect clouds around the arena that explode in the opposite order they appear. Explosions do damage and apply a dot to party members nearby.
Side 2 Phase 3:
Pain - Deals damage based on the number of stacks.
Agony - Places an unavoidable Dot on all party members on this side that ticks once for each stacks, clears stacks.
Pain and Pleasure - Fills the arena with green and black balls of energy. The green ones provide a percentage based heal, the black ones damage. Occasionally anima will switch the colors of them. They last 30 seconds and slowly move around.
Creates a statue look-alike of all four people on this side. If statues aren't destroyed they will switch spots with someone on the other side of the same type, DPS will switch with DPS, tank with tank.
Animas on both sides must die within 30 seconds of each other or both will be healed to 40%.
------------------------
Magic Pot
Many items around town have gone missing. Its your job to figure out how they are being stolen and who or what exactly is taking them!
After completing a mini-detective themed quest you will have all your armor stolen in a cutscene and the battle with Magic Pot begins.
All players enter the fight with their gear locked out with a big X over each piece for the exception of their weapon.
Each player will appear naked.
Phase 1: Oh no you caught me!
The magic pot is not interested in fighting you because you have nothing it can steal. It turns its back to you. Attacking the Magic Pot will cause the creature inside to retreat to his pot and then he uses an ability called "Leave me alone!" From the opening of his pot 10 tiny versions of the Magic Pot erupt. Each add is either Blue or Red. The blue magic pots can only be damaged from magic. The red magic pots can only be damaged from melee. Each of the mini-magic pots cast weak magic. After each of the mini-magic pots die a chest spawns in their place. 3 of the chests unlock a gear slot for everyone in the party while the remaining 7 are mimics that are much more difficult than the mini-magic pots. The mimics will not attack until they are 'opened' After 4 minutes the chests disappear whether they have been opened or not and Phase 2 enters.
Phase 2: Ooo you have shiney now!
After acquiring some of your gear the Magic pot has a slight interest in you. He will cast random debuffs on random players. He will heal himself if not interrupted. He will also cast weak magic on his main target. Upon reaching 75% the Magic Pot will lose interest and turn his back to you once more. 10 more powerful versions of the mini-magic pots will erupt from him being either blue or red. These adds will now cure each other and cast weak magic. When they die more chests spawn and 3 will unlock gear slots, 7 will be mimics. They will vanish after 4 minutes and phase 3 begins.
Phase 3: I want your shiney!
Seeing that you now have more gear the Magic pot decides to extend more effort in acquiring it. His debuffs will now create AoE on the ground while also hitting a random player. For example he will create a red AoE at someones feet that causes paralyze when it goes off and paralyze a different player. His damaging spells will do the same effect. His cures now add regen to himself if they go off. Upon reaching 50% he will once again lose interest and spawn 10 more adds. These adds will now cast enfeebles, cure and do damage. They will spawns chests, 3 that have gear and 7 that have mimics.
Phase 4: Gimmie! Gimmie! Gimmie!
From 50% to 0% the magic pot will now use abilities of his own. He will cast Thundaga on random players that hits everyone around that player. He will cast paralyza which will be an AoE paralyze on a random player as well as many other debuffs including sleep, miasma, blind, slow. His cures will become more powerful and apply regen. He will also use "Steal" which can be stunned but both cure and stun cannot be stunned or he will become immune. Steal will block off a random equipment slot to all players. He will also use Ether bomb on the tank which causes heavy damage and drains their MP. It will cause more damage the lower the tanks MP. Throughout the fight 10 adds will spawn like before periodically, while fighting the magic pot and spawn chests which can spawn mimics.
The challenge of this phase is the DPS will have to keep the adds down and unlock the right chests before the Magic pot removes too many gear slots and the tank dies.
Thread: Primal Fight Design
-
11-20-2013 08:45 PM #1Player

- Join Date
- Oct 2011
- Posts
- 116
- Character
- Professor Angler
- World
- Excalibur
- Main Class
- Pugilist Lv 50
Primal Fight Design
(5)Last edited by FCrowles; 11-20-2013 at 08:51 PM.
-
11-20-2013 09:03 PM #2Player

- Join Date
- Aug 2012
- Posts
- 111
- Character
- Flash Silver
- World
- Ragnarok
- Main Class
- Goldsmith Lv 50
Jesus.
You need to get a job at SE.
Enjoyed reading this. Sure does sound fun ^^ Nice work.(2)
-
11-21-2013 11:07 AM #3Player

- Join Date
- Apr 2012
- Location
- Limsa Lominsa
- Posts
- 413
- Character
- Blanitar Abarhyrsyn
- World
- Excalibur
- Main Class
- Dark Knight Lv 80
First off...fantastic ideas. Though I do think they may need some minor tweaking. One event I'm concerned with in particular:
I could see this presenting a major class dynamic issue. If the class chosen does not exist in the party what happens? Does no one get rushed? If so then many groups may begin taking 4 of the same DPS to entirely avoid or severely limit the effects of this mechanic. Might want to modify it to "This ability selects a random class based on current party composition. The class of the party member with the highest threat will never be chosen during this ability. In the even that multiple characters meet the class requirement both must run to the rune."
 Originally Posted by FCrowles
 (0)
(0)Last edited by Nabian; 11-21-2013 at 11:07 AM. Reason: Edited for character limit
-
11-21-2013 01:18 PM #4Player
- Join Date
- Oct 2011
- Posts
- 116
- Character
- Professor Angler
- World
- Excalibur
- Main Class
- Pugilist Lv 50
Oh! That is a good point. I didn't think of that, thank you!
Originally Posted by Nabian
(0)
-
11-21-2013 01:31 PM #5Player

- Join Date
- Sep 2013
- Location
- Limsa Lominsa
- Posts
- 330
- Character
- Jaidyn Sinclaire
- World
- Excalibur
- Main Class
- Dark Knight Lv 60
Awesome Read
(0)How I see the new abilities:
Asylum - Get ready for my holy spam because that's the only healing you gonna get.
Aero III - I guess I should put some dots up before holy spamming.
Assize - I need more MP to spam holy even more, also stop getting hit in the face.
Tetragrammaton - I guess I should heal that tank now.
Stone III - There's less than 3 mobs left alive. - Ragns Meuhie
-
11-22-2013 12:59 AM #6Player

- Join Date
- Nov 2013
- Location
- Laredo, Texas
- Posts
- 701
- Character
- Phil Collins
- World
- Midgardsormr
- Main Class
- Marauder Lv 60
Lots of fun reading, I wanna contribute some soon but I have class in a bit. I will later on
(0)
-
12-01-2013 01:55 AM #7Player

- Join Date
- Aug 2013
- Posts
- 68
- Character
- Dart Frost
- World
- Diabolos
- Main Class
- Marauder Lv 50
Awesome. Full support.
(0)
-
12-01-2013 04:57 PM #8Player
- Join Date
- Nov 2013
- Location
- Laredo, Texas
- Posts
- 701
- Character
- Phil Collins
- World
- Midgardsormr
- Main Class
- Marauder Lv 60
I started coming up with ideas for Shiva, Ramuh, Fat Chocobo, and Behemoth King but not done with any. I'll try to post tomorrow though, but I have finals coming up.
(0)
 Reply With Quote


